How to Choose and Fit a Backpack
For any outdoor enthusiast, from the casual day hiker to the seasoned thru-hiker, the backpack is more than just a bag; it’s a vital piece of equipment that can make or break an adventure. A poorly chosen or ill-fitting pack can lead to discomfort, pain, fatigue, and even injury, turning what should be a joyous trek into a miserable ordeal. Conversely, a backpack that’s perfectly suited to your body and your trip can feel like an extension of yourself, distributing weight efficiently and allowing you to move freely and comfortably for miles on end. At WildGridScout, we believe in practical outdoor skills and minimalist gear advice, and few things are more practical or crucial than mastering the art of backpack selection and fitting.
This comprehensive guide will walk you through the essential considerations for choosing the right backpack and, more importantly, how to adjust it for a perfect, comfortable fit. Forget the notion that one size fits all – your backpack should be as tailored to you as a good pair of hiking boots.
Why a Proper Backpack Fit is Non-Negotiable
Before we dive into the ‘how-to,’ let’s understand the ‘why.’ The human body is designed to carry weight, but it’s crucial how that weight is distributed. A well-fitted backpack transfers the majority of the load (around 70-80%) to your hips and legs – your body’s strongest muscle groups. An ill-fitting pack, however, places undue stress on your shoulders, neck, and back, leading to:
- Pain and Discomfort: Sore shoulders, aching back, pinched nerves.
- Fatigue: Your body expends more energy compensating for poor weight distribution.
- Reduced Mobility: An unbalanced pack can throw off your equilibrium, making tricky terrain even harder.
- Potential Injury: Long-term stress can lead to chronic back issues or nerve damage.
In short, a proper fit ensures comfort, efficiency, and safety, allowing you to enjoy the journey without distraction.
Choosing Your Backpack: Key Considerations
Selecting a backpack involves more than just picking a color you like. Here are the critical factors to consider:
1. Capacity (Liters)
The size of your pack, measured in liters, dictates how much gear you can carry. Match the capacity to your typical trip duration:
- Daypack (15-30 Liters): Ideal for single-day hikes, carrying essentials like water, snacks, a first-aid kit, and an extra layer.
- Weekend Pack (30-50 Liters): Suitable for overnight or two-to-three-day trips. Can accommodate a sleeping bag, tent, food, and clothing.
- Multi-day/Backpacking Pack (50-80+ Liters): Designed for longer excursions (3+ days) or when carrying more specialized gear, such as in winter.
Always err slightly on the side of having a bit more space than you think you’ll need, but avoid overpacking and choosing an unnecessarily large pack, as it encourages you to carry more than you need, adding unnecessary weight.
2. Torso Length – The Most Important Measurement
This is where many people make their first mistake. Backpack size is determined by your torso length, not your height. A 6-foot-tall person might have a shorter torso than a 5-foot-6-inch person. Most reputable outdoor retailers will offer packs in different torso sizes (e.g., S, M, L) or adjustable torso systems.
How to Measure Your Torso Length:
- Find your C7 vertebra: This is the prominent bone at the base of your neck when you tilt your head forward.
- Locate your iliac crest: Place your hands on top of your hip bones, with your thumbs pointing towards your spine. Draw an imaginary line between your thumbs.
- Measure the distance: Have a friend measure the vertical distance between the C7 vertebra and the imaginary line between your thumbs. This is your torso length.
Compare this measurement to the backpack manufacturer’s sizing chart. If you’re between sizes, generally opt for the smaller size as it’s easier to adjust up than down.
3. Hip Belt Design
As mentioned, your hips should bear the majority of the pack’s weight. A good hip belt should:
- Be well-padded and contoured to your body.
- Wrap snugly around your iliac crest (the top of your hip bones), not your waist.
- Have easily adjustable straps.
Some packs offer interchangeable hip belts to further customize the fit.
4. Shoulder Straps
Shoulder straps primarily stabilize the load and keep the pack from pulling away from your body. They should curve comfortably over your shoulders without any gaps or digging in. They should not be bearing significant weight. Padded straps are a plus, but excessive padding can hinder movement.
5. Frame Type
- Internal Frame: Most modern backpacking packs. The frame (often aluminum stays or a plastic sheet) is integrated into the pack, keeping it close to your body for better balance and stability on technical terrain.
- External Frame: Less common today, but still used for carrying heavy, bulky, or unusually shaped loads. The pack bag is attached to an external metal frame. Offers excellent ventilation and often more lashing points.
- Frameless: Typically very small daypacks or minimalist ultralight packs. Relies on the packed gear to provide structure. Only suitable for experienced minimalist hikers with very light loads.
6. Features and Access
Consider features like hydration reservoir compatibility, multiple access points (top-loading, front-panel access), external pockets for water bottles or snacks, compression straps to stabilize the load, and an integrated rain cover. Prioritize features that genuinely enhance your experience without adding unnecessary weight or complexity.
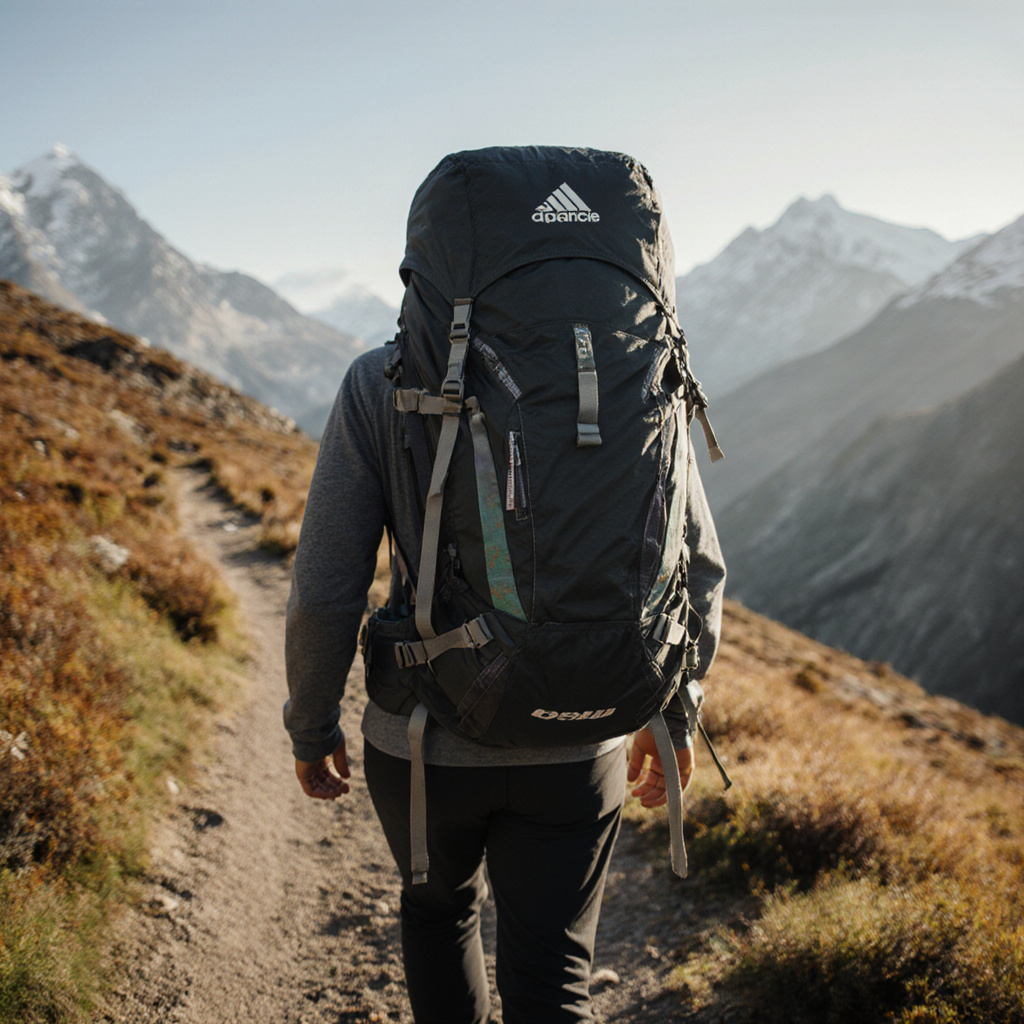
How to Fit Your Backpack: A Step-by-Step Guide
Once you’ve selected a pack based on capacity and torso length, the real magic happens during the fitting process. It’s crucial to do this with some weight in the pack (ideally 15-20 pounds for backpacking packs) to simulate real-world conditions. Many outdoor stores provide sandbags or weights for this purpose.
- Load the Pack: Fill the pack with gear or weights, distributing the heaviest items close to your back and between your shoulder blades.
- Loosen All Straps: Before putting the pack on, fully loosen the hip belt, shoulder straps, load lifters, and sternum strap.
- Put on the Pack: Carefully lift the pack and place it on your back.
- Adjust the Hip Belt (First and Foremost): This is the most critical step.
- Position the hip belt pads so they sit directly over your iliac crest (the top of your hip bones).
- Pull the hip belt straps forward and tighten snugly. The hip belt should feel secure, transferring most of the pack’s weight to your hips. You should be able to feel it “hug” your hips.
- Tighten Shoulder Straps:
- Pull the shoulder straps down and back until they feel snug but not tight. They should primarily stabilize the pack, not bear its weight.
- Look for the point where the shoulder straps connect to the pack body. This connection point should be about 1-2 inches below the top of your shoulders. If it’s too high or too low, your torso length is likely incorrect.
- Adjust Load Lifter Straps: These straps connect the top of the shoulder straps to the top of the pack body.
- Pull them forward until they form a 45-degree angle from your shoulder straps to the pack.
- Tighten them just enough to pull the top of the pack closer to your body, preventing it from flopping backward. Over-tightening can pull the shoulder straps off your shoulders.
- Fasten and Adjust the Sternum Strap: This strap connects the two shoulder straps across your chest.
- Move it up or down until it rests comfortably across your sternum (breastbone), usually about 2-3 inches below your collarbones.
- Tighten it just enough to pull the shoulder straps slightly inward, preventing them from slipping off your shoulders. Do not over-tighten, as it can restrict breathing.
- Fine-Tune and Test: Walk around, bend over, simulate movements you’d make on a trail. Make micro-adjustments to each strap until the pack feels balanced and comfortable. There should be no pressure points, gapping, or excessive movement.
Common Fitting Mistakes to Avoid
- Ignoring Torso Length: Relying on height instead of torso length is a recipe for discomfort.
- Shouldering the Weight: Your shoulders should not bear the primary load. If they are, your hip belt isn’t adjusted correctly or your torso length is off.
- Over-tightening Straps: While snug is good, overly tight straps can restrict movement and circulation.
- Not Loading the Pack: You can’t get an accurate fit with an empty pack.
Conclusion
Choosing and fitting a backpack is a foundational skill for anyone venturing into the outdoors. It’s an investment in your comfort, safety, and enjoyment. Take the time to measure your torso, research pack features, and most importantly, try on different packs with weight in them. Don’t hesitate to seek assistance from knowledgeable staff at outdoor retailers like REI or local specialty shops – their expertise is invaluable. A properly fitted pack means less fatigue, more miles, and a deeper connection with the wilderness. Happy trails!
Sources:
- REI Expert Advice: How to Choose a Backpack, How to Pack and Fit a Backpack
- Osprey Packs: Osprey Pack Fit Guide
- Backpacker Magazine: Numerous articles on gear selection and fitting.